Saturday, October 27, 2018

Friday, October 26, 2018

tentang libre cad pada linux desktop

source : https://linuxhint.com/install-librecad-ubuntu/

How to install LibreCAD 2.1.3 on Ubuntu & Linux Mint

How to install LibreCAD, a free Open Source personal CAD application for Windows, Macintosh and Linux. It’s a comprehensive, 2D CAD app that is available for download and install for free. In addtion, it’s available in more than 20 languages and for all major operating systems, including Microsoft Windows, Mac OS X and Linux (Debian, Ubuntu, Fedora, Mandriva, Suse, …).
install LibreCAD

LibreCAD Features

LibreCAD is a feature-packed and mature 2D-CAD application with some really great advantages:

  • It’s obviously free
  • No language barriers hence making it available in a large number of languages, with more being added continually.
  • You can use it, customize it, hack it as well as copy it with free user support and developer support from our active worldwide community and ou experienced developer team.
  • LibreCAD is an Open Source community-driven project meaning development is open to new talent as well as new ideas, and our software is tested and used daily by a large and devoted user community; you, too, can get involved and influence its future development.

LibreCAD 2.1.3 Changelog

  • Shift would not activate the command line
  • Command+Tab didn’t always activate the current drawing on OS X

How to Install LibreCAD 2.1.3 on Ubuntu 17.04, Ubuntu 16.10, Ubuntu 16.04, Ubuntu 15.04, Ubuntu 14.04

  • As at the time of writing this blog, the PPA was still 2 versions late so if that is the case, please follow the compile steps below if you really want to install this version. Note that this method take a little longer to complete.
sudo add-apt-repository ppa:librecad-dev/librecad-daily

sudo apt-get update && sudo apt-get install librecad

How to uninstall LibreCAD 2.1.3 from Ubuntu

sudo apt-get remove librecad

How to compile LibreCAD on Ubuntu 17.04, Ubuntu 16.10, Ubuntu 16.04, Ubuntu 15.04, Ubuntu 14.04

  • Install required dependencies
sudo apt-get install g++ gcc make git-core qtbase5-dev libqt5svg5-dev qttools5-dev qtchooser qttools5-dev-tools libmuparser-dev librsvg2-bin libboost-dev libfreetype6-dev libicu-dev pkg-config

sudo apt-get install qt5-default
  • Create a develop directory
mkdir -p ~/develop/LibreCAD
  • Clone LibreCAD repository
cd ~/develop/

git clone https://github.com/LibreCAD/LibreCAD.git
  • Update the LibreCAD repository
cd ~/develop/LibreCAD

git checkout master

git pull -r
  • Build libreCAD
qmake -r

make -j4
  • Launch LibreCAD
./unix/librecad &

alternative autocad untuk linux ( OPEN SOURCE )

source : https://www.linuxtechi.com/autocad-alternative-tools-for-ubuntu-linuxmint-users/
FreeCAD

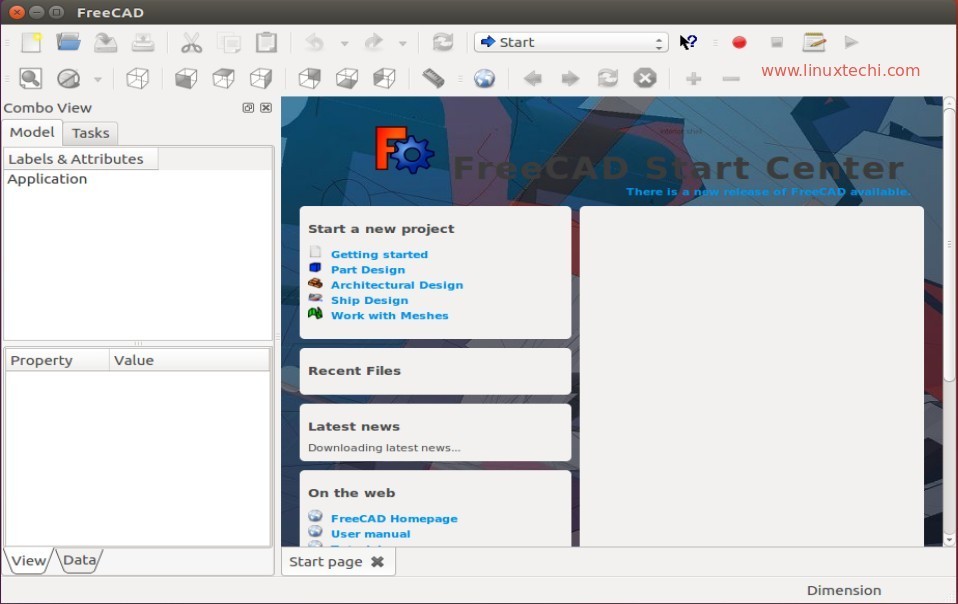
FreeCAD is a free and open source 3D( Three Dimensions) modeler and CAD (Computer aided Design) software. It is used for product design and also used in mechanical engineering. Freecad debian packages are available in the Ubuntu and Linux Mint 18 default repositories.
Run the following command from the terminal to Install FreeCAD
linuxtechi@cloudera:~$ sudo apt update
linuxtechi@cloudera:~$ sudo apt install freecad
Once you are done with installation type freecad command from the terminal to start FreeCAD.
linuxtechi@cloudera:~$ freecad
freecad-on-Ubuntu-linuxmintjpg

LibreCAD

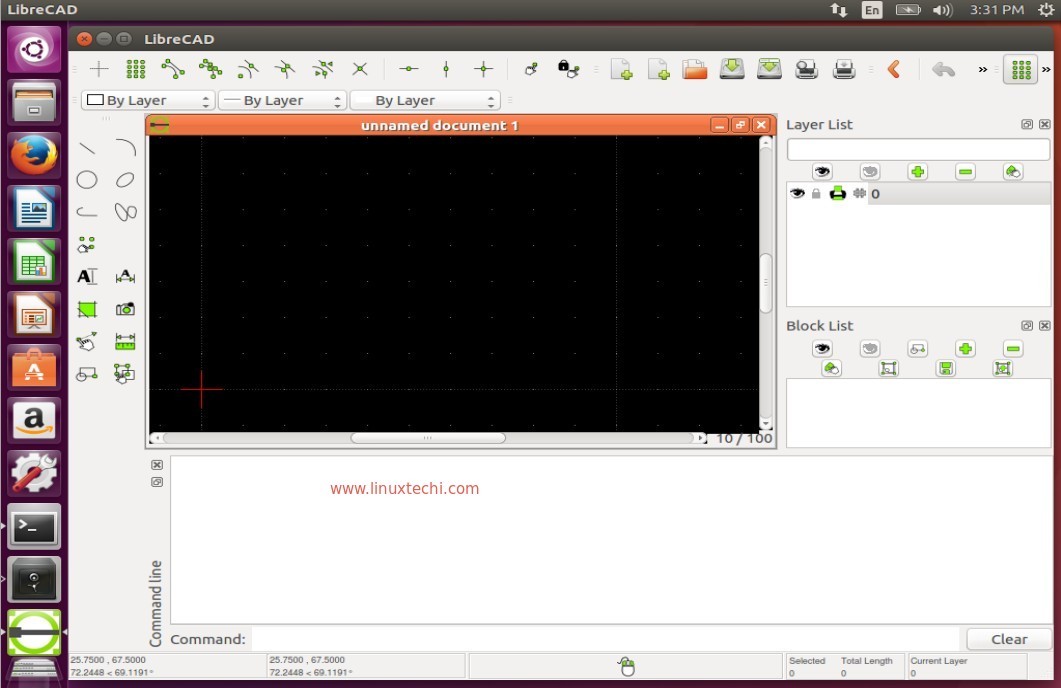
LibreCAD is another free and open source CAD Software in 2 two dimensions. LibreCAD is used for creating technical drawings like plans for building, interiors and mechanical parts.
LibbreCAD can be installed and used in Linux, Apple and Windows platform. Run the below apt command from the terminal to install librecad on Ubuntu and Linux Mint.
linuxtechi@cloudera:~$ sudo apt install librecad
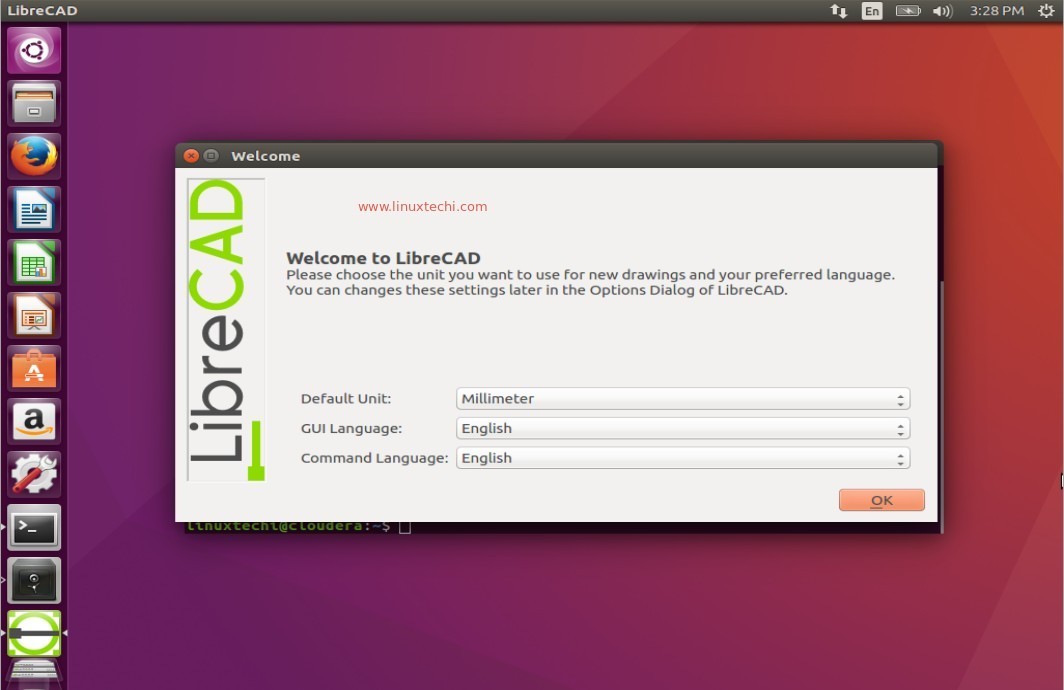
Once installation is completed, Access LibreCAD.
Access-LibreCAD-Ubuntu-LinuxMint
Select the GUI and Command Language as per your setup and click on OK.
LibreCAD-Home-Screen-Ubuntu-LinuxMint

KediCAD

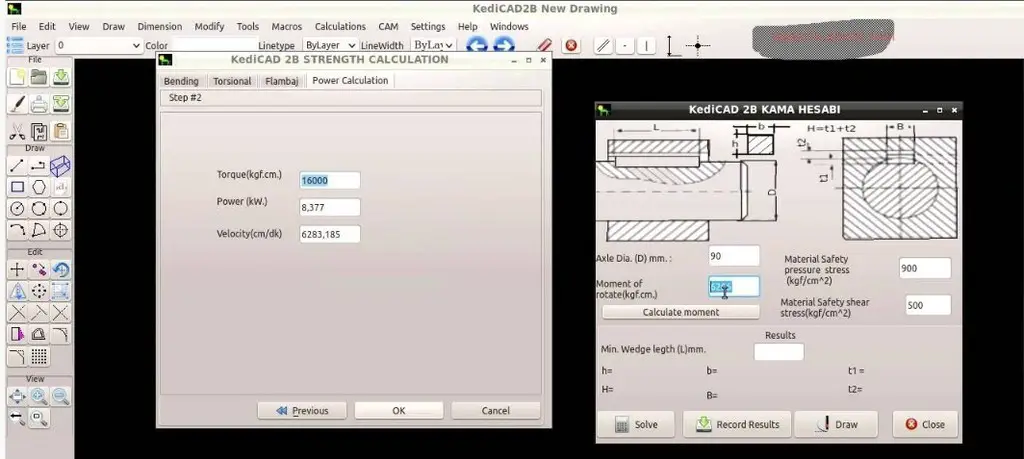
KediCAD is a two dimension ( 2D) CAD software for linux like operating system. KediCAD has simulation feature and it can make the anticapted changes to the general drawings. KediCAD can be used in for creating drawing from moment of inertia calculations, buckling power calculations and lot more…
KediCAD package is not available in the Ubuntu and Linux Mint repositories, so download the kedicad Debian package from its official web site using below wget command.
linuxtechi@cloudera:~$ wget http://kedicad.com/indir/kedicad2b_0.1.5821-1_all.deb
Install the downloaded KediCAD Debian package.
linuxtechi@cloudera:~$ sudo dpkg -i kedicad2b_0.1.5821-1_all.deb
linuxtechi@cloudera:~$ sudo apt install -f
KediCAD-Ubuntu-Linux

BRL-CAD

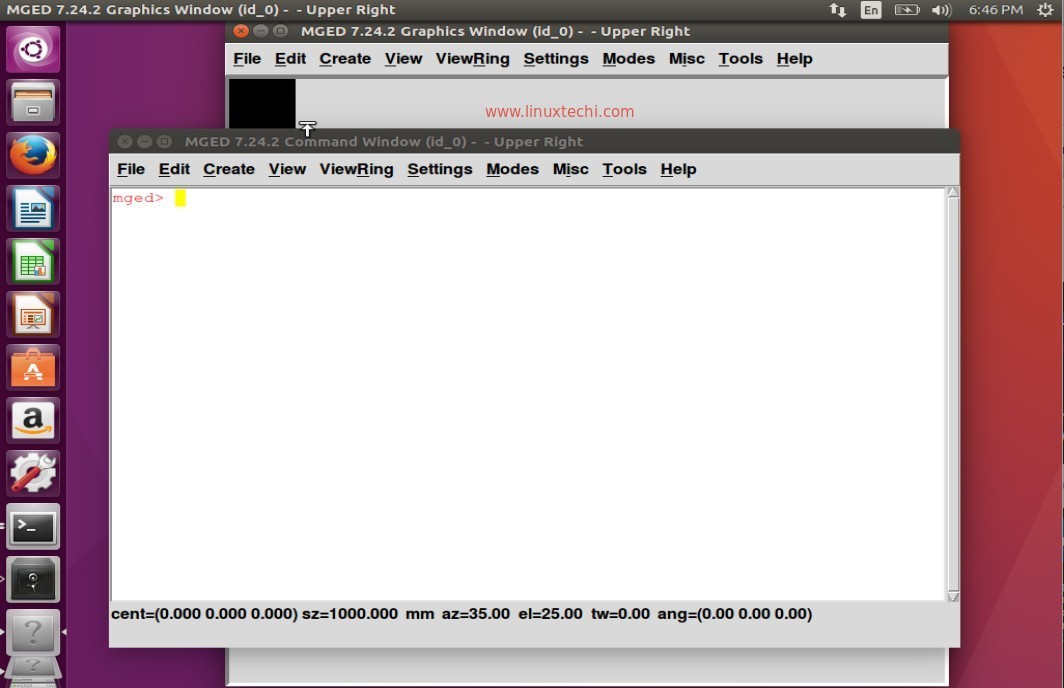
BRL-CAD is a free and open source CAD (Computer Aided Design) software. It provides the features of graphics rendering and geometric analysis.  Refer the below steps to install BRL-CAD on Ubuntu 16.04/16.10 and Linux Mint 18.
Download the latest and stable version of BRL-CAD from source forge site :
https://sourceforge.net/projects/brlcad/files/
Or use the below wget command to BRL-CAD from the console
linuxtechi@cloudera:~$ wget https://sourceforge.net/projects/brlcad/files/BRL-CAD%20for%20Linux/7.24.2/brlcad_7.24.2-0_amd64.deb
Install the downloaded package using dpkg command
linuxtechi@cloudera:~$ sudo dpkg -i brlcad_7.24.2-0_amd64.deb
Run the below command to run brlcad
linuxtechi@cloudera:~$ sudo /usr/brlcad/bin/benchmark run
linuxtechi@cloudera:~$ /usr/brlcad/bin/mged
brl-cad-ubuntu-linuxmint

DraftSight

DraftSight is free CAD software which can be used in Ubuntu and Linux Mint. DraftSight can be considered as the alternative of AutoCAD tool on Linux like operating system. It permits the users to edit and save DWF and DXF files and allows users to export files as .pdf, .jpg, .png, and .svg.
Let’s First download the DraftSight package for Ubuntu 16.04 and Linux Mint 18 using below URL :
Install the Downloaded draftsight debian package using below dpkg command :
linuxtechi@cloudera:~$ sudo dpkg -i draftSight.deb
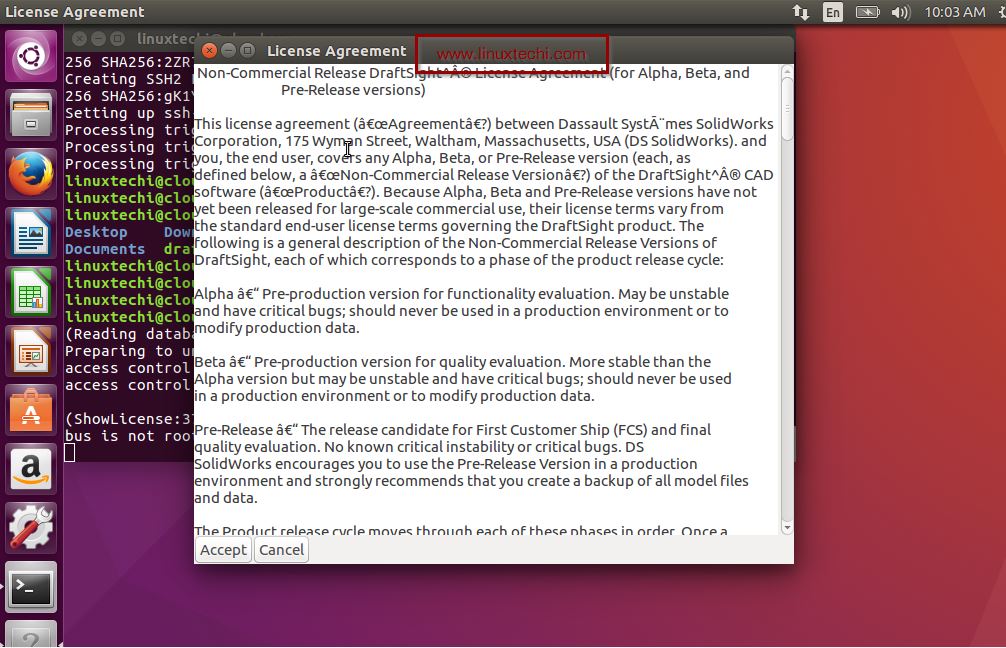
DraftSight-License-Agreement
Click on Aceept
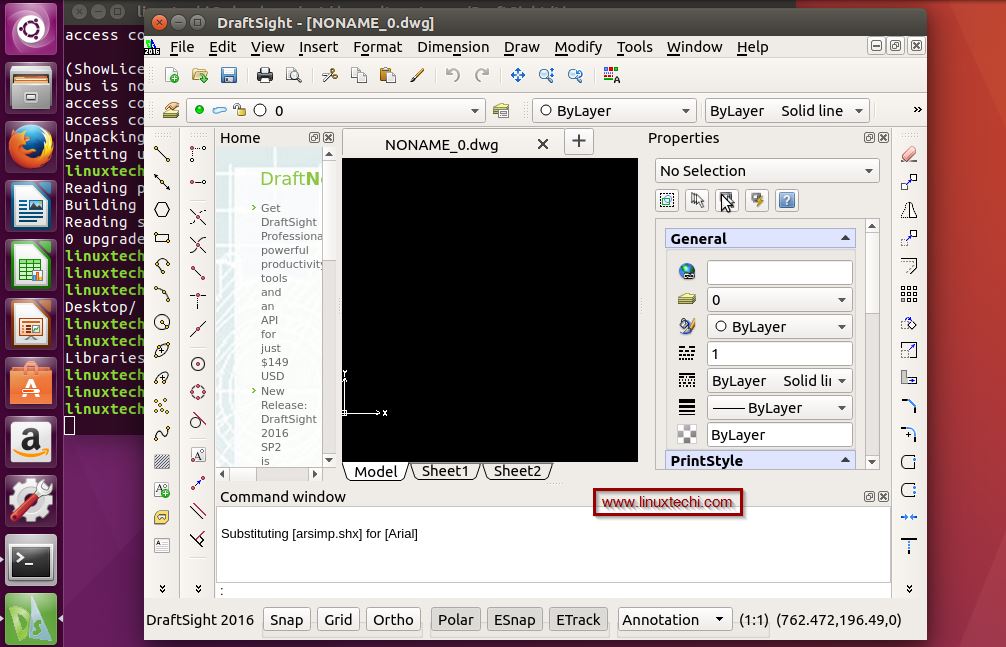
Once the Installation is completed and try to access Draftsight using below commands
linuxtechi@cloudera:~$ cd /opt/dassault-systemes/DraftSight/Linux/
linuxtechi@cloudera:/opt/dassault-systemes/DraftSight/Linux$ ./DraftSight
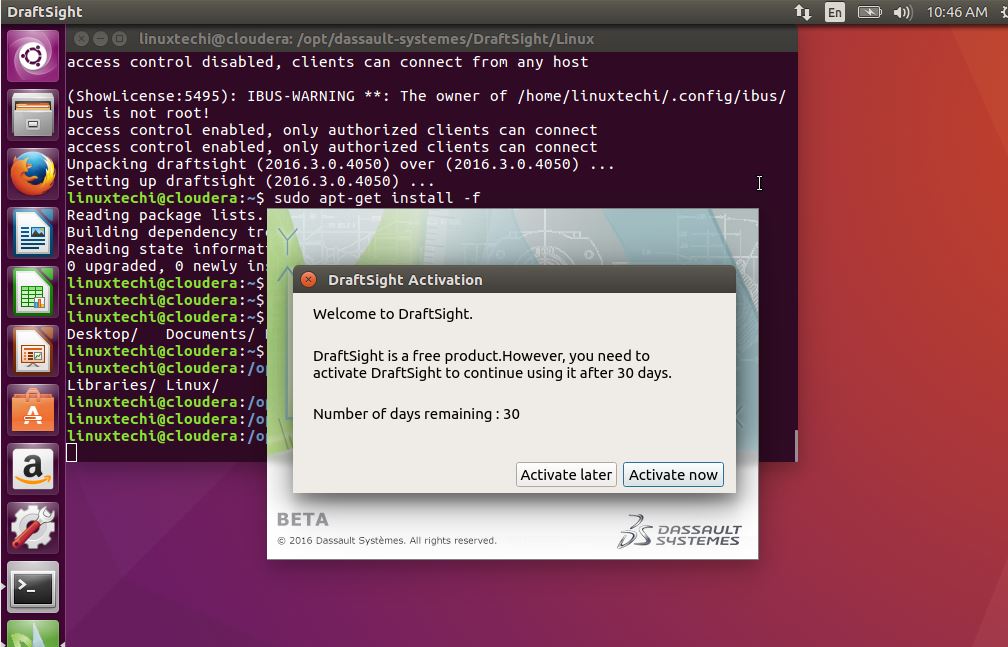
DraftSight-Activation-Window
We can use DraftSight for 30 days without activation. For Activation we need to enter email address and other required fields only and an email will be delivered to the mailbox for activation.
DraftSight-Ubuntu-LinuxMint
That’s all,  Kindly share your feedback and comments. Please don’t hesitate to share the name of the tools that can be used as AutoCAD alternative in Ubuntu and Linux Mint.

Wednesday, October 17, 2018

solusi ip hotspot sudah penuh 254 ip address :::

IP pool hotspot dari 10.5.50.10 - 10.5.50.254
Misalnya udah penuh... ip address yg di gunakan 10.5.50.1/24

solusinya
ganti menjadi 10.5.50.1/23
trus poolnya lebarkan, kalo /23 jadinya
10.5.50.10 - 10.5.51.254

dengan begini kita dapat 510 ip address

atau

10.5.50.1/22 > kita bisa dapat 1022 IP address hotspot

atau seperti yg di bawah ini juga boleh ( pilih salah satu )

contoh pool nya :

Trims to rekan diskusi saya : Riswan Mulyadi S.kom ^_^


Tuesday, October 16, 2018

Cara Mengatasi Lupa Password Login Windows 7 Tanpa Software

sumber : http://aquerly.blogspot.com/2015/04/cara-mengatasi-lupa-password-login.html

Postingan ini ditujukan hanya untuk pembelajaran dan penulis hanya sekedar membantu kepada anda yang
 lupa password login windows 7, sehingga anda dapat masuk ke windows tanpa perlu install ulang OS serta
tidak di tujukan untuk hal-hal yang merugikan orang lain, dan kemungkinan cara ini juga bisa diterapkan di
 windows 8.

LANGKAH-LANGKAH :
1. Hidupkan komputer dan restart komputer.
2. Pada saat komputer di restart dan masuk ke starting windows(setelah proses POST(Power On Self Test)pengecekan diri sendiri ketika komputer di hidupkan), tekan tombol power pada komputer sampai
 komputer benar-benar mati(cara ini dilakukan untuk memunculkan pilihan launch startup repair(recommended)).


3. Setelah melakukan hard shutdown (pada langkah nomor 2) lalu hidupkan kembali komputer dan akan ada
 pilihan dengan tulisan launch startup repair(recommended) dan start windows normally(dikarenakan hard
shutdown akan menganggu proses start awal windows yang akan memunculkan pilhan seperti gambar di bawah).


4. pilih launch startup repair (recommended).
5. Setelah memilih launch startup repair (recommended) maka proses repair startup akan berjalan. Setelah itu
ketika windows menanyakan/ada pesan dari windows dengan tulisan  Do you want to restore your computer
using system restore?  pilih dan klik tombol cancel.


6. proses ini memakan waktu sampai puluhan menit, setelah itu akan muncul pesan dengan tulisan startup
 repair could not repair the computer automatically, dan disinilah kita akan memanfaatkan celah untuk dapat mengganti password login windos nantinya, selanjutnya tekan panah kebawah untuk membuka View problem
 details.


7. pada View problem detaills scroll sampai paling bawah lalu klik pada link privacy statement(klik yang
bertuilsan  x:\windows\system32\en-US\errofflps.txt).


8. akan muncul Notepad yang berisi tulisan mengenai privacy statement di dalamnya, selanjutnya pilih dan
klik menu file lalu klik Open.


 9. setelah klik open, arahkan dan klik  computer > Local Disk > Windows > system 32
(local disk adalah tempat dimana di installnya windows biasanya di local disk c:)
 atau yang masih bingung arahkan dan klik computer > local disk c : >windows >system 32.


10. ubah jenis file of type dari Text document (*txt) menjadi all files dengan cara klik arah panah ke bawah
 pada file of type dan klik all files.


11. Cari file aplikasi sethc (file accessibility keys program).


12. Rename file sethc menjadi sethc-bak.


13. Selanjutnya cari file cmd(file program command prompt) klik kanan cmd dan copy dilanjutkan dengan
klik kanan dan paste(klik kanan cmd setelah itu tinggal klik kanan tetapi klik kanan di area background putih
dan paste).


14. dan sekarang sudah mendapatkan file bernama cmd-copy, selanjutnya klik kanan cmd-copy dan rename
 menjadi sethc.


15. tutup semua windows dan klik finish(setelah klik finish komputer akan me restart dengan sendirinya).
16. setelah proses restart selesai, komputer akan masuk ke menu login tempat isian password, selanjutnya
 tekan shift 5 kali pada keyboard (jika tidak berhasil tekan shift berulang-ulang sampai command prompt
 dengan administrator privilage muncul) untuk memunculkan command prompt.


17. window command prompt akan muncul dengan administrator privilage.


18. ketik :
net user 
dan dilanjutkan dengan menekan tombol enter pada keyboard
maka akan muncul nama user name administratornya.


19. di sini penulis mencontohkan user name dengan nama owner (pada gambar diatas owner adalah
 user name sebagai administrator)  lalu ketik : net user (nama komputer) tekan enter
contoh :
net user owner
maka akan tampak seperti gambar dibawah.


20. setelah itu ketik : net user (nama komputer) * dan tekan enter(setelah menekan enter akan ada prompt
 seperti gambar dibawah dan perintah net user (user name) * adalah perintah untuk mereset password login windows 7)
contoh;
net user owner *  
setelahnya akan di minta password baru(saat mengisi password baru maka password yang lama sudah tidak
bisa digunakan dan ingat-ingat password baru yang di ketik jangan sampai kelupaan password lagi) untuk
masuk login ke windows 7 dan konfirmasi password(type a password for the user dan retype the password
 to confirm), ketik password dan ketik ulang password/dua kali mengetik password yang sama dan tekan
 enter, setelahnya ketik exit atau tutup command prompt.


21. dan setelah keluar dari command prompt. Komputer sekarang berada di login windows 7 dan ketik
password baru yang barusan anda buat, jika berhasil maka komputer akan masuk ke menu desktop.


22. selesai, selamat mencoba dan semoga berhasil.